

How To Draw Plaid Step By Step
Plaid Backgrounds
by Beverly Stewart
Make your own plaid backgrounds.
Supplies
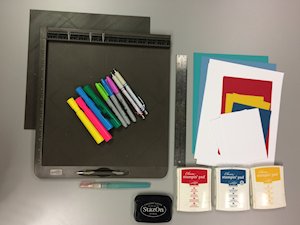
- Cardstock (Watercolor paper and Dapper Denim used here, white cardstock for practicing)
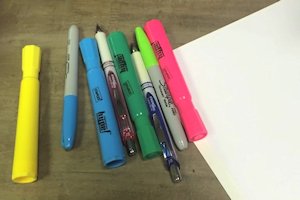
- Diverseness of markers and pens (Chisel Point Highlighters, Sharpie, and Gel Pens used here)
- Aquapainter or other watercolor brush
- Watercolor medium (ink from Real Ruddy, Crushed Curry, and Dapper Denim ink pads used here)
- Masking tape or washi tape
- Ruler or direct edge
- Scoring tool or ruler and pencil
- Black StazOn Pad (optional)
- Other supplies as needed to consummate the project
Step-by-Pace
-
Step ane
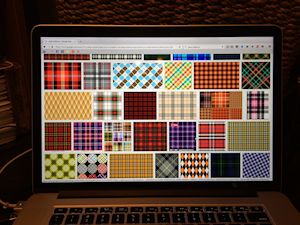
Apply your favorite net search engine to inquiry plaids and to open your optics to the multitude of options. Search for "Plaid Patterns" or "Tartan Patterns". Click on "Images" to encounter only the plaids. Narrow the results by clicking on a color or the specific name of a plaid.
-
Stride 2
Begin past practicing with a slice of white cardstock. Y'all can use a full sail or cut it into menu forepart sizes. This is exercise, but use cardstock in case you like the results and desire to employ it on a menu. Give yourself permission to experiment, make mistakes and throw information technology away if yous don't like it.
Utilize markers and pens yous are familiar with, so you are only worried about the pattern to begin with and not the tools.
-
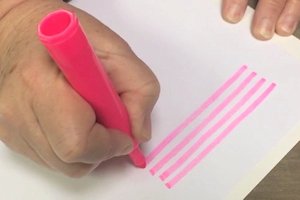
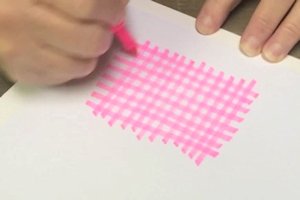
Step three
Practice cartoon with chisel point markers or highlighters. Begin with a unproblematic check or gingham. These are evenly spaced lines using a single colour—about a marker's width apart in both directions.
-
Plough your paper to get the steadiest position for your mitt. Go along your piece of work right in front of you and you volition draw straighter lines.
-
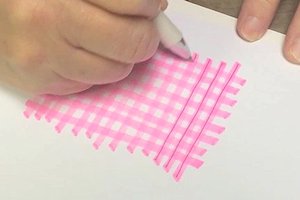
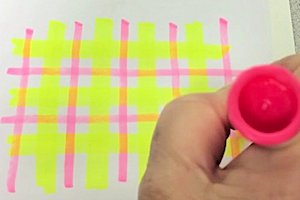
Footstep 4
Embellish some of your gingham practise pieces with thinner lines. Try going right across the heart of the lines you take already drawn…
-
…or across the white spaces.
-
Step 5
For a more complex plaid, draw a widely spaced gingham with very wide lines and very wide white spaces between them—endeavour about 3/8" or ane/2" lines and spaces.
-
Change mark colors and draw a marker'south width (ane/iv") line downwards the eye of the white spaces.
-
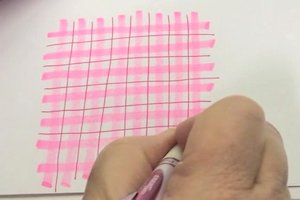
Pace 6
Describe a double row of lines downwards the middle of your original wide (yellow) line.
Variations for exercise:
Single line down middle of white space. Single or double line down the center of a broad stripe. Single or double lines next to a broad stripe, but off middle. Varying widths and colors. If you want to keep the practice pieces you accept worked on, you can die cut them into shapes to use on your cards.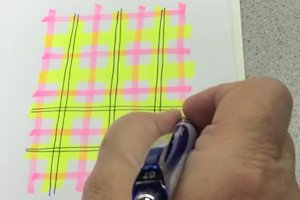
-
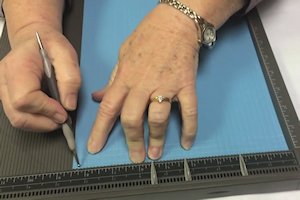
Stride 7
Set up a filigree to aid guide your hand and eye. Use a gridded mat or paper, or create your own. 1 way is to create scored grid lines on cardstock.
-
Turn the scored paper over and run a black StazOn pad over the lines on the dorsum to emphasize the filigree.
NOTE:
StazOn is waterproof so you won't get smudges on your finished slice.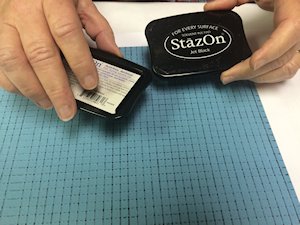
-
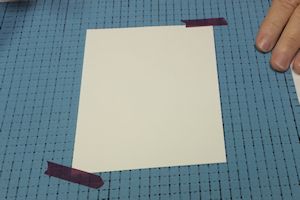
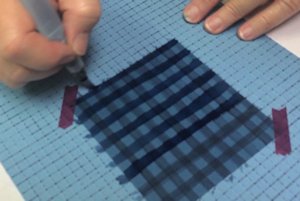
Step 8
Marshal and tape a card front to the grid with masking tape. You may use a ruler or a direct edge equally a guide to line up the grid marks and show your castor where to become.
TIP:
If using a ruler equally a guide line, don't put the brush right next to the ruler. Water will flow under your ruler and make a mess. Put the ruler near the brush and allow your center follow the ruler, but don't permit the castor affect it.
-
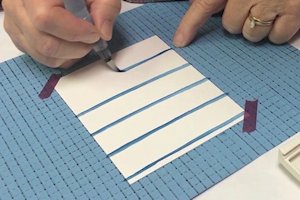
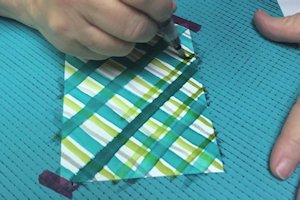
Pace 9
Create straight lines from i side of the card front to the other. First with the short side to proceeds confidence.
-
Go on calculation colored lines in one direction. To avert color bleeding, it is important to allow the stripes to dry completely before adding criss-cross stripes.

-
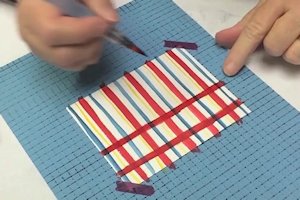
Step 10
Plough the panel and echo the pattern.
-
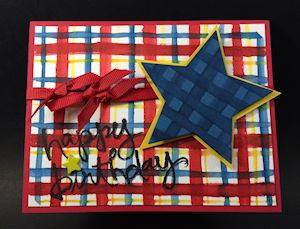
Stride 11
Use the finished panel to create a bill of fare or other project.
Video!
Variations
-
Try working on colored cardstock. This works especially well with tone on tone colors and/or white on colored cardstock.
-
Angle the cardstock on the grid and create a diagonal plaid using the aforementioned process.
Your Plough
You've seen the tutorial, now you try it! We've got a section of the gallery set aside for Plaid Backgrounds. Endeavour this technique, and then upload your artwork to the gallery. Evidence us your creations!
***Delight note - Internet Explorer/Edge is not a supported browser, and will not allow you lot to see the videos. Please use Chrome, Firefox or Safari to view our tutorial videos.

Source: https://www.splitcoaststampers.com/resources/tutorials/plaidbackgrounds/
Posted by: baileyrectelon.blogspot.com
0 Response to "How To Draw Plaid Step By Step"
Post a Comment