

How To Draw A Gothic Arch
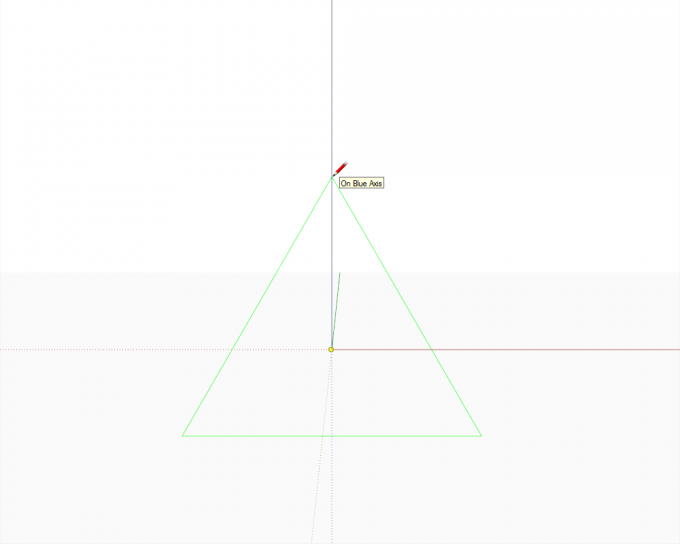
Get-go of all, nosotros need to decide what kind of arch the window will take. I decided that it will be an equilateral arch (just because that's one of the well-nigh common Gothic arches) so we need to start with a triangle. Select the polygon tool, type 3s into the Measurement box, press Enter and draw a triangle in Front end view. Make sure yous are pulling the radius upwards (along the blue axis).
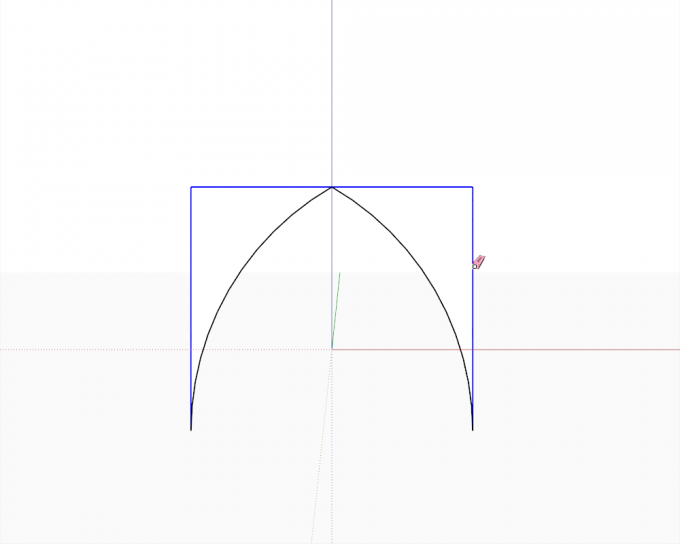
Start drawing a rectangle around the triangle snapping to the endpoints.

Bear on doing information technology...
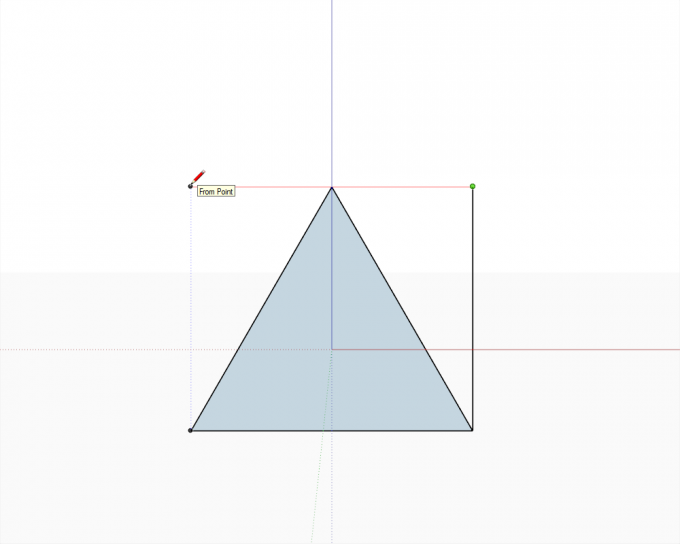
...and when done, delete the tritangle which will leave us with three, faceless edges.

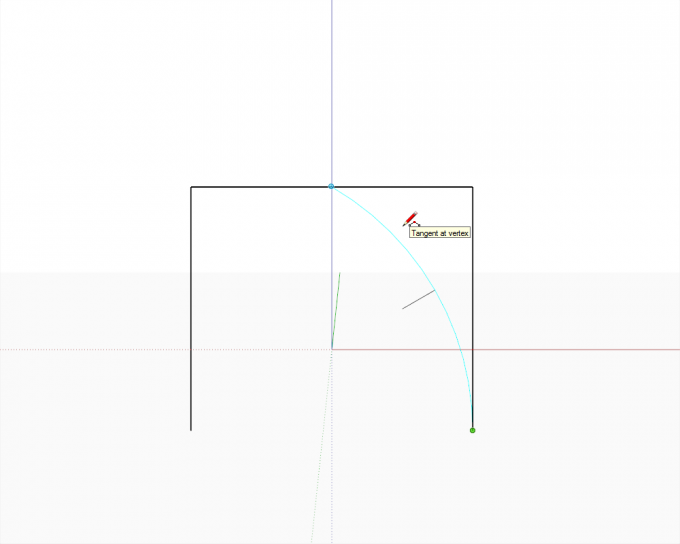
Now from a bottom endpoint describe an arc to the top midpoint. Make certain to only stop the arc when you meet the cyan "Tangent at vertex" inference.
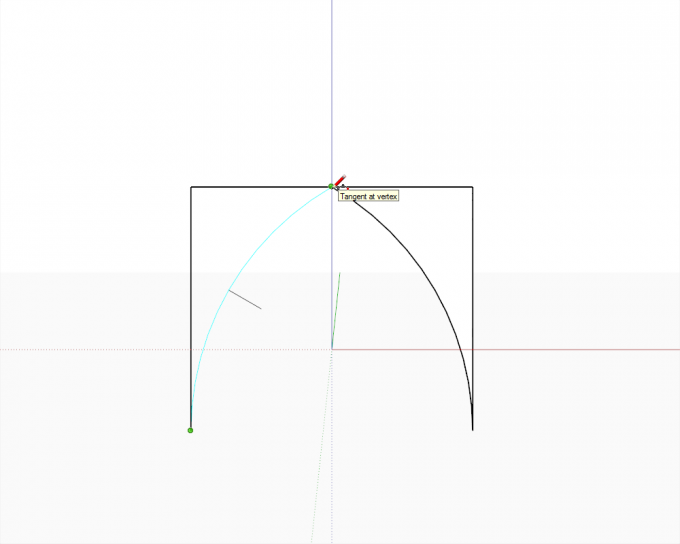
Draw the other arc similarly.
Delete the rectangle.
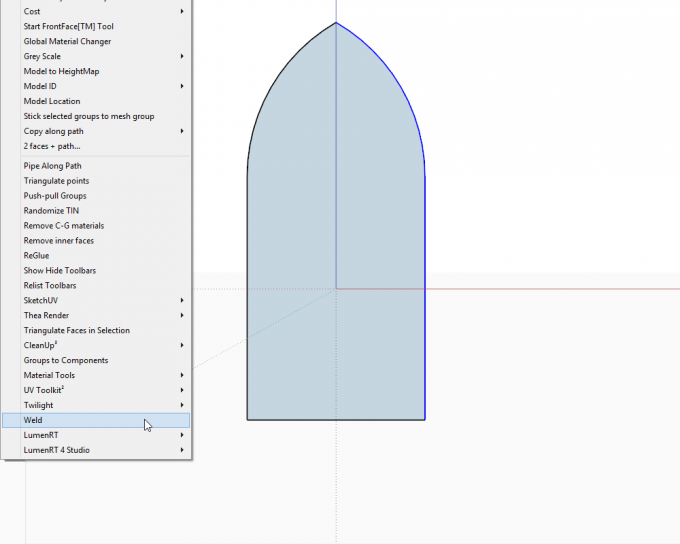
Finish the bottom of the window as you wish (make it as tall as y'all need). Now use the Weld plugin to weld the arc and the jamb together into a continuous polyline.
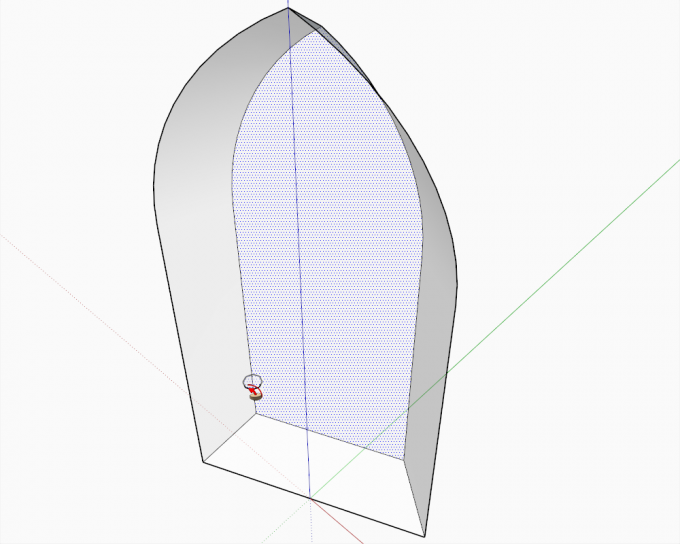
PushPull it back to about as deep every bit one-half of your wall thickness (nosotros can adjust this depth more precisely subsequently).
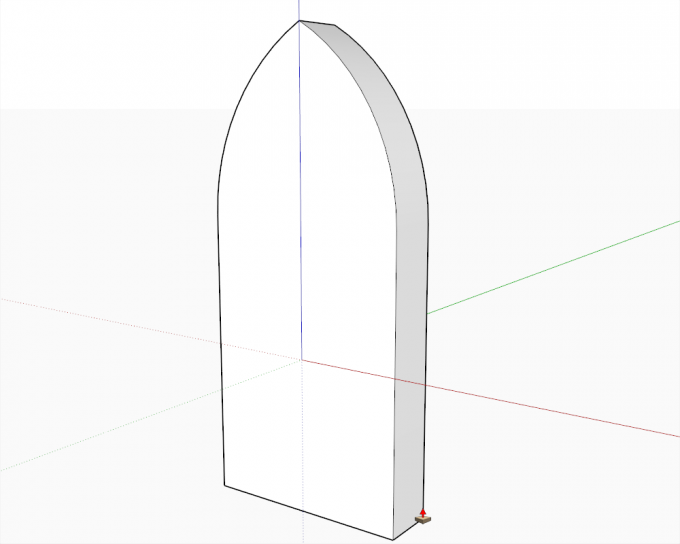
Delete the front face

Depict ii guide lines as far from the lesser and a side as you lot wish the splaying to exist and while belongings the Ctrl key Scale the dorsum in a single management most the middle - once to adjust the width...
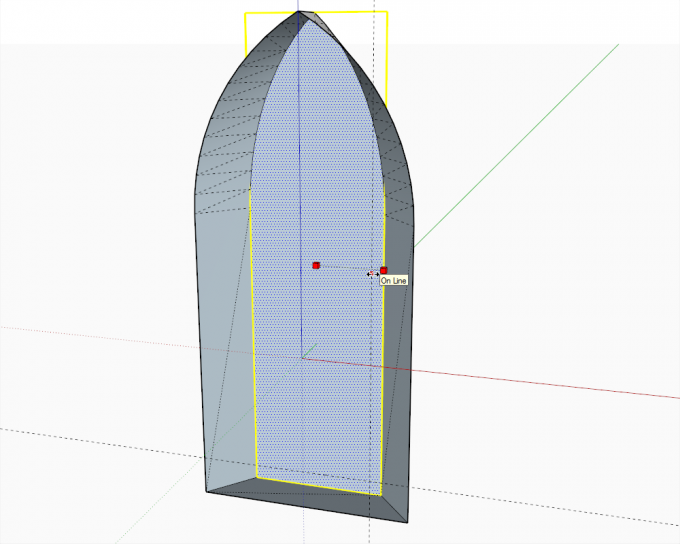
...and once to adjust the height. See how additional edges announced due to autofolding.

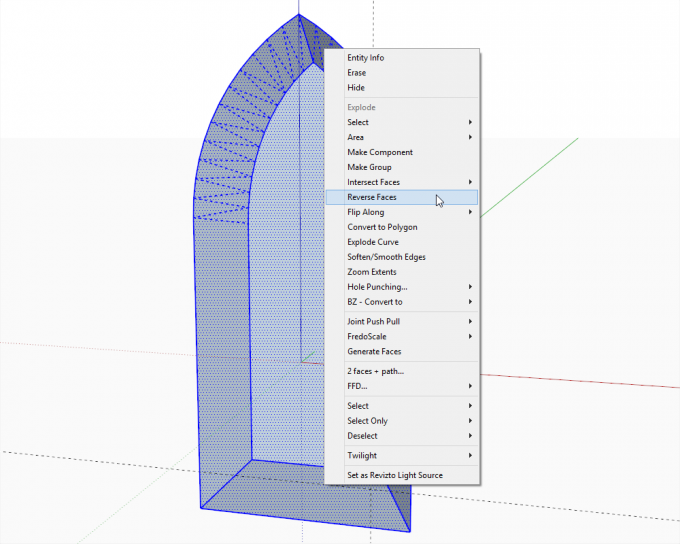
Time to clean up a bit and reverse the faces - then brand the whole thing a component that cuts an opening (yous tin practise this later, too).
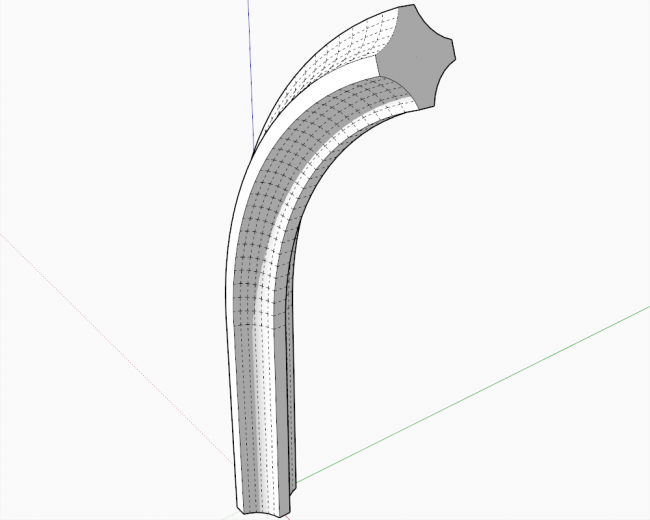
Now draw an octagon and extrude it around the perimeter of the opening.
Why octagon, one may ask. The answer is simple; much of Gothic geometry is based on (or derived from) octagonal shapes. Although the cantankerous department of nearly of the ribs are commonly more than complex, this complextity, if needed, can be added to the surfaces of the bearing, octagonal shape.
Here we endeavor to apply the minimum of geometry in gild to balance between performance and visual furnishings. Of course, something like this cross section showed below (fifty-fifty if the arcs to create the curved profile are reduced to 6 segments instead of the default 12) would be more proper for many Gothic elements simply could easily boost our poly-count.
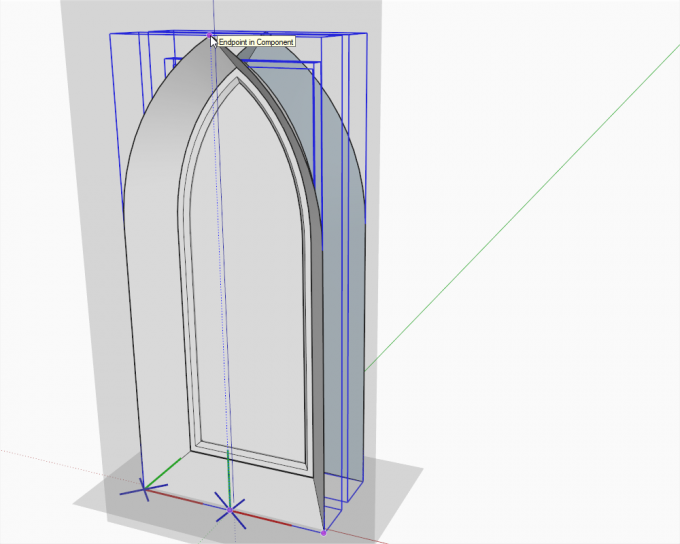
We are almost there only see that the opening is a bit behind the frame and it volition also need some adjusting.
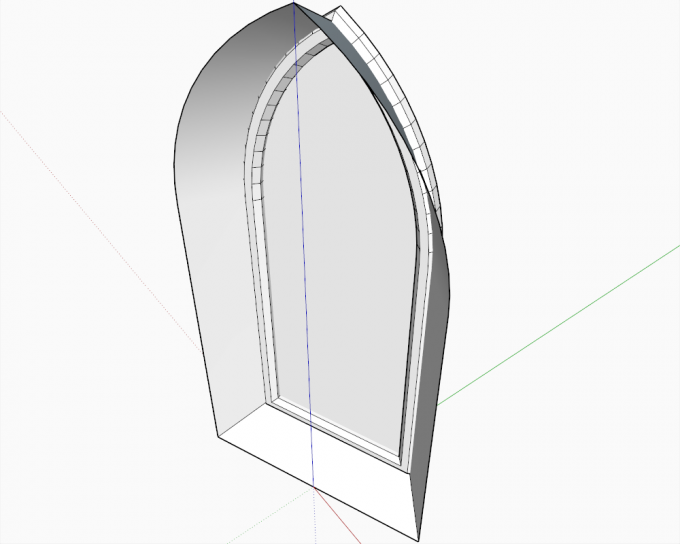
Move it in front of the frame, and in a like mode every bit in a higher place (belongings the Ctrl key) scale it to snap exactly to the front-most, outer edge of the frame.
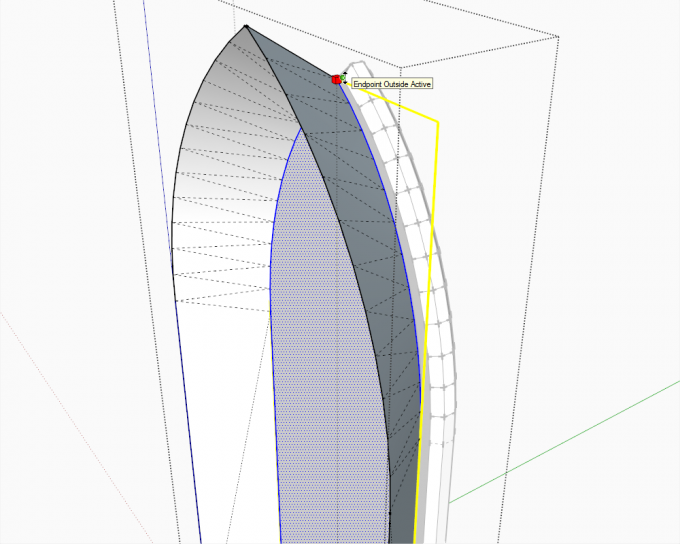
Exercise it in both direction (fixing the width below). Then move the opening back and then that it exactly snaps to the outside of the frame.

Brand a re-create of information technology (Crtl+C) and scale the whole thing forth by -1 to mirror it.
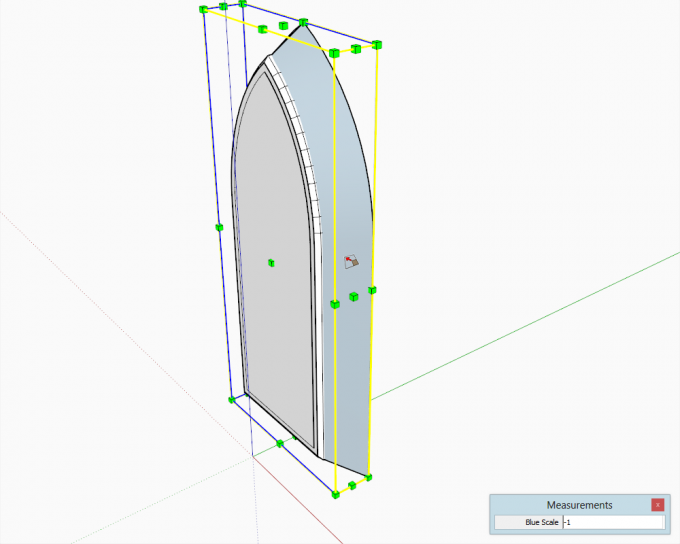
Move the mirrored opening to the opposite side of the frame.

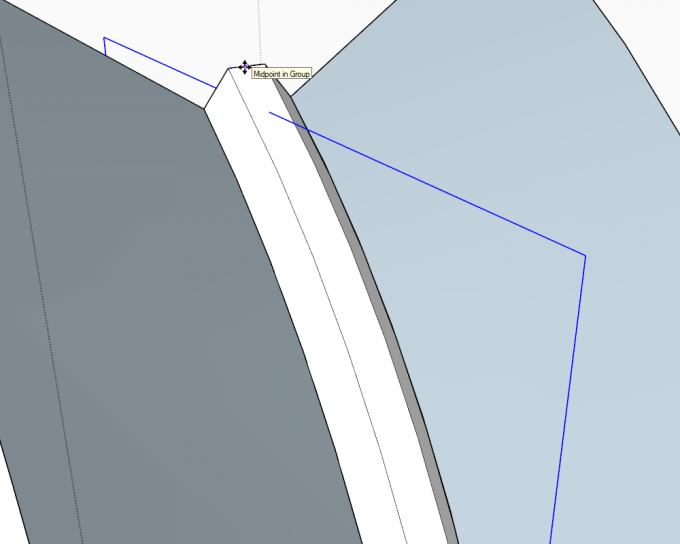
Become to the Edit carte and "Paste in place" the original example of the component (which we copied above). Too, brand a group of the window "glass" face, cut it from the component (we only needed information technology and so far to brand selection of the back edges easy by double clicking on it).
Leave the component and use Edit > Paste in identify to put the glass console group dorsum in the model.

Finally, move it to exactly the heart of the frame.
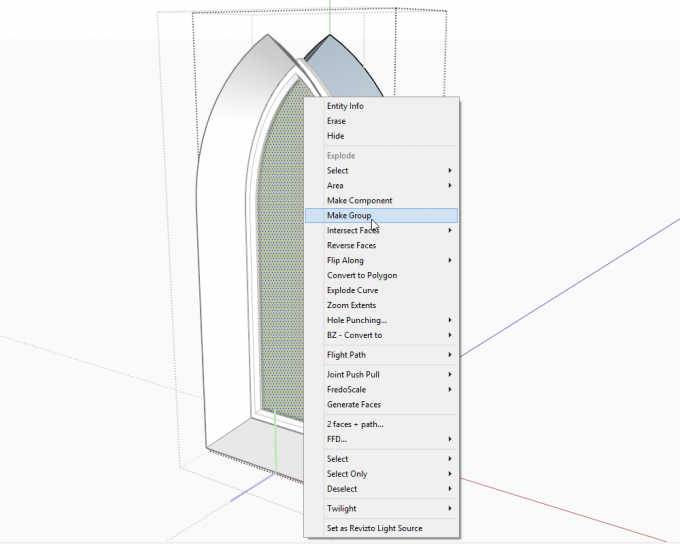
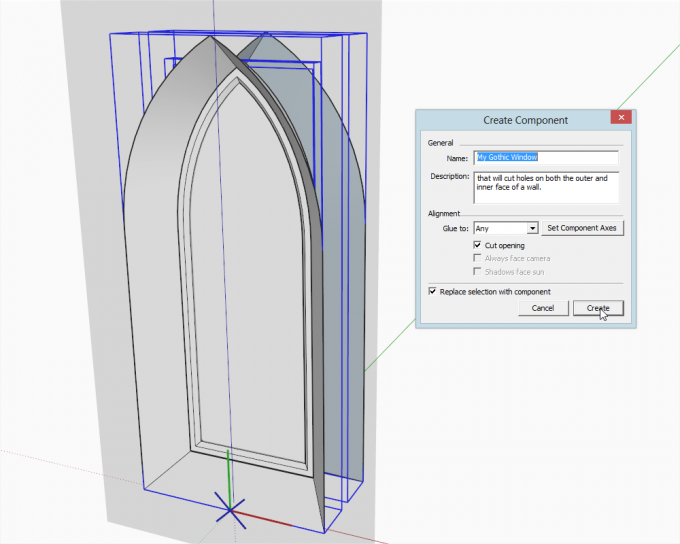
Then select the whole affair and make a wrapper component in this fashion so that later information technology can cut holes on both sides of a thick wall. Virtually important thing is to set the component axes carefully.
Make sure that "Supersede selection with component" is checked (in this case, if nothing else is involved, information technology is normally checked by default).
Registered members are welcome to add their thoughts in the respective forum topic.

Source: http://sketchucation.com/resources/tutorials/408-modelling-a-gothic-window-1
Posted by: baileyrectelon.blogspot.com
0 Response to "How To Draw A Gothic Arch"
Post a Comment